Considering Android Development
A bit of basics then some
 Timothy Lim
/ @thewheat
Timothy Lim
/ @thewheat
Slides: http://cornergeeks.com/gdg/
Code: https://github.com/CornerGeeks/GDGBruneiDevFest2013
APK: http://cornergeeks.com/gdg/devfest2013.apk
Introduction & Pre-requisites
- Things I wished I knew when I started
- Hope you have some Java knowledge
- Quite a bit of material to give you a quick start
- If you have a question, just ask
What do I need?
- Java & Android SDK
- IDE
- No IDE
- Android Studio is the future and the UI seems more responsive, but Eclipse is faster at compilation (for now)
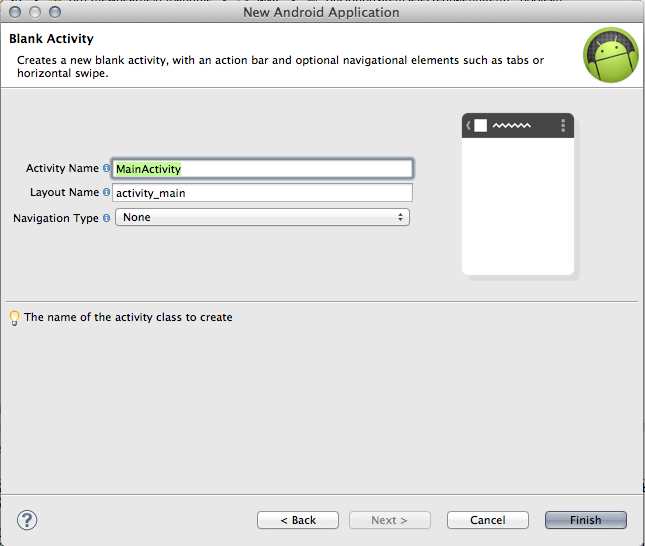
Starting a new Project
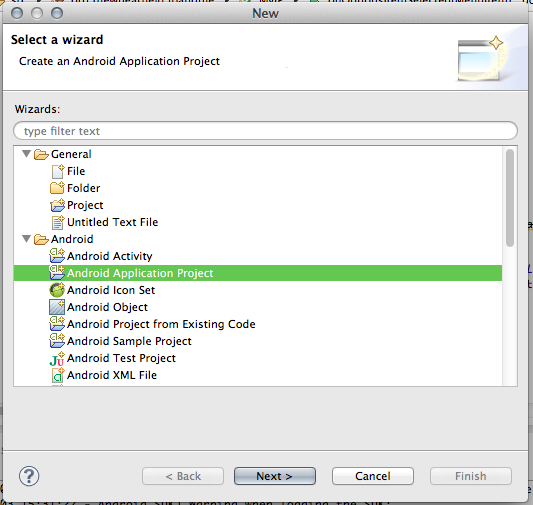
Starting a new Project
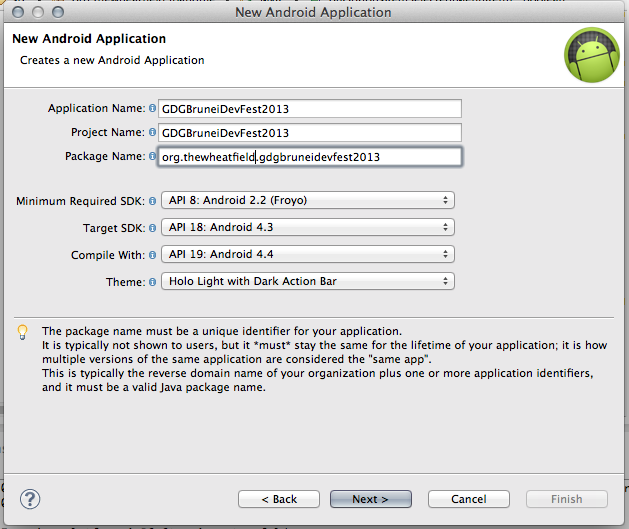
Starting a new Project
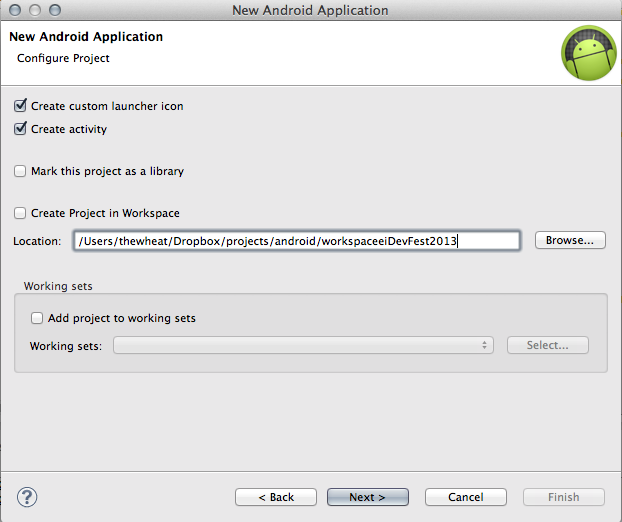
Starting a new Project
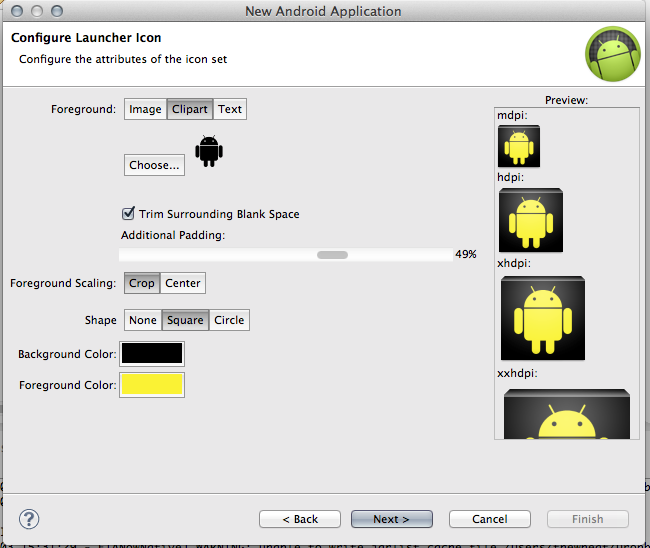
Starting a new Project
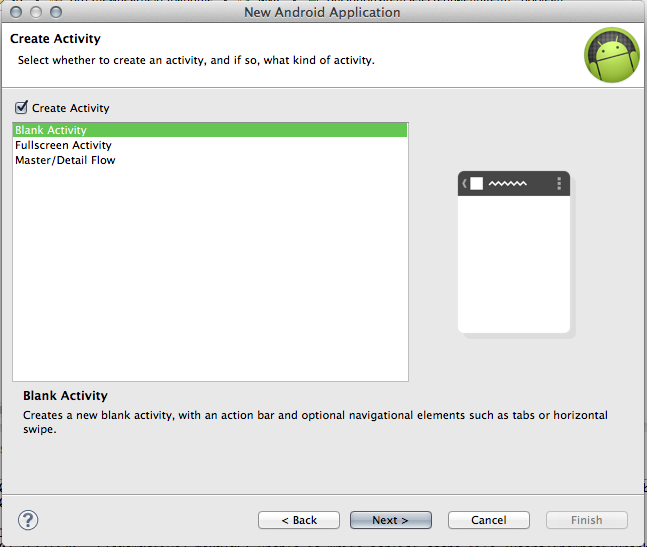
Starting a new Project
Layout of a project Directory
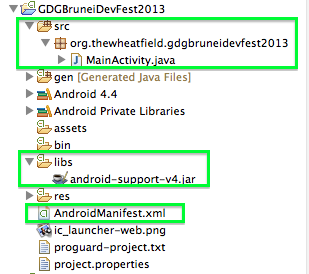
- src directory: all your code belongs to this folder (or libraries distributed as source)
- libs directory: using libraries that you download online as a .jar
- AndroidManifest.xml: configuration settings on the app itself.
Layout of a project Directory
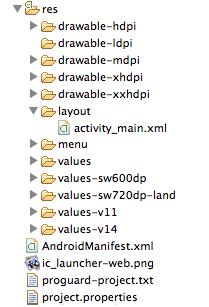
- res directory: resources for images, menus, strings
Activity
"An Activity is an application component that provides a screen with which users can interact in order to do something"
- E.g. Newspaper downloader.
- Activity 1: List of all downloaded editions
- Activity 2: Paged view of all pages for that edition
- Think of different activities like different programs that can accept differet inputs
- ping android.com
- ipconfig
- ipconfig /flushdns
AndroidManifest.xml
Define your activities in the manifest
This one application currently has one activity
Activity - Life cycle
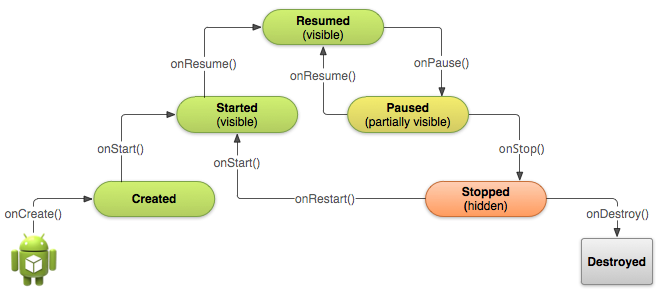 Android Training Docs / Java Docs
Activity - Life cycle
public class MainActivity extends Activity {
    @Override // onCreate call everytime the app is started or even rotated
    protected void onCreate(Bundle savedInstanceState) {
        // savedInstanceState used to load data from previously saved state
        super.onCreate(savedInstanceState);
        //if (savedInstanceState != null)
        //    mDate = savedInstanceState.getString(STATE_DATE);

        // load a layout view based on name in directory
        setContentView(R.layout.activity_main);
    }
    @Override // save state!
    public void onSaveInstanceState(Bundle outState) {
        // outState.putString(STATE_DATE, mDate);
    }
}
View Layouts
res/layout/activity_main.xml
<RelativeLayout xmlns:android="http://schemas.android.com/apk/res/android"
    xmlns:tools="http://schemas.android.com/tools"
    android:layout_width="match_parent"
    android:layout_height="match_parent"
    tools:context=".MainActivity" >

    <TextView
        android:id="@+id/lblName"
        android:layout_width="wrap_content"
        android:layout_height="wrap_content"
        android:text="@string/hello_world" />

</RelativeLayout>
Text loaded from res/values/strings.xml
<?xml version="1.0" encoding="utf-8"?>
<resources>
    <string name="app_name">GDGBruneiDevFest2013</string>
    <string name="action_settings">Settings</string>
    <string name="hello_world">Hello world!</string>
</resources>
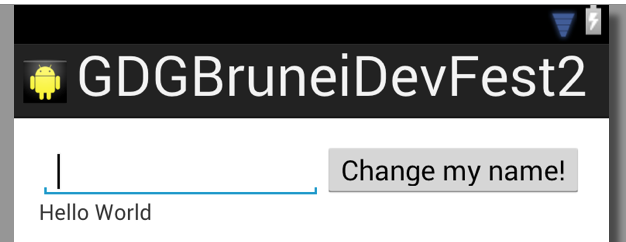
Default App Output

User Interaction
Add a TextView and Button to the view
<EditText
   android:id="@+id/iptName"
   android:layout_width="fill_parent"
   android:layout_height="wrap_content"
   android:layout_alignParentLeft="true"
   android:layout_toLeftOf="@+id/btnChangeName">
</EditText>

<Button
   android:id="@+id/btnChangeName"
   android:layout_width="wrap_content" android:layout_height="wrap_content"
   android:layout_alignBaseline="@+id/iptName"
   android:layout_alignBottom="@+id/iptName"
   android:layout_alignParentRight="true"
   android:text="@string/change_name" />
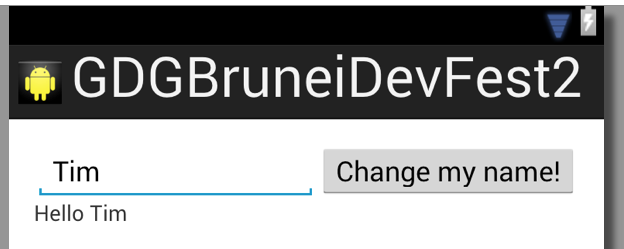
User Interaction
Add a clickHandler & Update the screen
TextView lblName = (TextView) findViewById(R.id.lblName);
TextView iptName = (TextView) findViewById(R.id.iptName);
Button btnChangeName = (Button) findViewById(R.id.btnChangeName);
if(btnChangeName != null){
    btnChangeName.setOnClickListener(new OnClickListener() {
        @Override
        public void onClick(View v) {
            if(lblName != null && iptName != null){
                lblName.setText(getString(R.string.hello_world)
                    + " " + iptName.getText());
            }
            else{
                lblName.setText("-");
            }
        }
    });
}
Saving Data
Simple key-pair values. Saved on device
private static final String ID
    = "org.thewheatfield.gdgbruneidevfest2013.saveddata";
private static final String data_names = "names";

SharedPreferences data = c.getSharedPreferences( LocalData.ID
    , Context.MODE_PRIVATE);
// saving data
SharedPreferences.Editor editor = data.edit();
editor.putString(data_names, dataToSave);
editor.commit();
// reading data. if not found set to empty string
String allnames = data.getString(data_names, "");
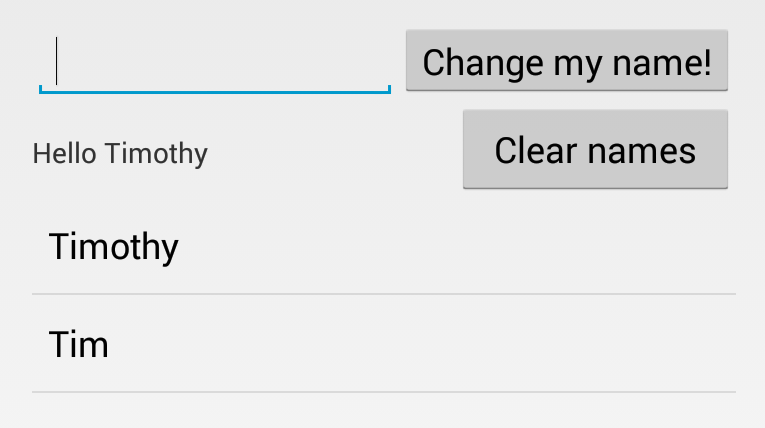
Lists & Adapters
The Adapter retreives the data (from a source such as an array or a database query) and converts each entry into a view that can be added into the AdapterView layout
AdapterView subclasses are used when layout is dynamic or not pre-determined. e.g. lists
Lists & Adapters
View
<ListView
   android:id="@+id/listNames"
   android:layout_width="match_parent"
   android:layout_height="fill_parent"
   android:layout_alignParentBottom="true"
   android:layout_alignParentLeft="true"
   android:layout_alignParentRight="true"
   android:layout_below="@+id/btnDeleteNames" >
</ListView> String[] names;
...
this.names = this.data.readNames();
...
ListView listNames = (ListView) findViewById(R.id.listNames);
// use standard simple list layout from core android
ArrayAdapter<String> adapter = new ArrayAdapter<String>(this,
android.R.layout.simple_list_item_1, names);
listNames.setAdapter(adapter);
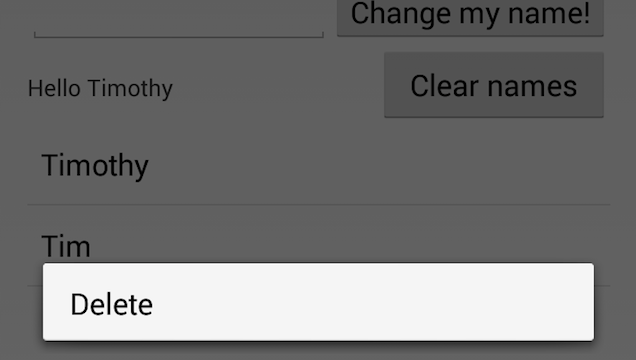
Lists & Adapters
Context Menu
Long press on items
registerForContextMenu(listNames);
@Override
public void onCreateContextMenu(ContextMenu menu, View v,
                                ContextMenuInfo menuInfo) {
    super.onCreateContextMenu(menu, v, menuInfo);
    MenuInflater inflater = getMenuInflater();
    inflater.inflate(R.menu.context_menu, menu);
}
<?xml version="1.0" encoding="utf-8"?>
<menu xmlns:android="http://schemas.android.com/apk/res/android" >
<item android:id="@+id/deleteName" android:title="@string/delete"
android:titleCondensed="@string/delete"></item>
</menu>
Context Menu
@Override
public boolean onContextItemSelected(MenuItem item) {
    AdapterContextMenuInfo info=(AdapterContextMenuInfo)item.getMenuInfo();
    switch (item.getItemId()) {
        case R.id.deleteName:
            handleDeleteName(info.position); return true;
        default:
            return super.onContextItemSelected(item);
    }
}
Sharing with Intents
Share Text
Intent shareIntent = new Intent();
shareIntent.setAction(Intent.ACTION_SEND);
shareIntent.putExtra(Intent.EXTRA_TEXT, name);
shareIntent.setType("text/plain");
startActivity(Intent.createChooser(shareIntent,
    getResources().getText(R.string.share)));
Share Photos
Intent shareIntent = new Intent();
shareIntent.setAction(Intent.ACTION_SEND);
shareIntent.putExtra(Intent.EXTRA_STREAM,
    Uri.parse("file://" + imageToShare.getAbsolutePath())); // saved on disk
shareIntent.setType("image/jpeg");
startActivity(Intent.createChooser(shareIntent,
    getResources().getText(R.string.action_share)));
Intents and Intent Filters (API Guide) / Android Intents - Tutorial (vogella.com)
Network Connectivity
- Must be done in the background / asynchronously
- There should be no long running processes in the main UI thread
- Extend AsyncTask class or use a library like AsyncHttpClient
- Don't forget to add permission to AndroidManifest.xml
<uses-permission android:name="android.permission.INTERNET"/> - For testing in the emulator. Your host computer IP is 10.0.2.2
(mongoose/ HFS / other web server of choice)
Network Connectivity
(new DownloadNamesTask).execute(url);
...
private class DownloadNamesTask extends AsyncTask {
    @Override
    protected String doInBackground(String... urls) {
        try {
            return downloadUrl(urls[0]);
        } catch (IOException e) { return null; }
    }

    @Override
    protected void onPostExecute(String resultFromDoInBG) {
        processResponse(resultFromDoInBG); updateUI();
    }
}
AsyncHttpClient client = new AsyncHttpClient();
client.get(URL, new AsyncHttpResponseHandler() {
    @Override
    public void onSuccess(String response) {
        processResponse(response); updateUI();
    }
});
Internationalization
- Add another strings.xml in values-CountryCode folder
- e.g.
- values-in : Indonesia
- values-bm : Bahasa Melayu (I think)
- Supporting Different Languages (Android Training Docs)
Supporting Different Screen Densities
A dp is a density-independent pixel (that corresponds to the physical size of a pixel at 160 dpi)
An sp is the same base unit, but is scaled by the user's preferred text size (it’s a scale-independent pixel)
- sp: Text
- dp: Padding & Element Widths & Heights
- px: Don't use!
Supporting Different Screen Densities
Different resources based on device configurations
res/layout/layout.xml             // layout for normal screen size ("default")
res/layout-small/layout.xml       // layout for small screen size
res/layout-xlarge/layout.xml      // layout for extra large screen size
res/layout-xlarge-land/layout.xml // layout for extra large
                                  //   in landscape orientation

res/drawable-mdpi/icon.png        // bitmap for medium density
res/drawable-hdpi/icon.png        // bitmap for high density
res/drawable-xhdpi/icon.png       // bitmap for extra high density
Using Libraries
- Installation / Usage
- Copy to libs folder & import in necessary .java file
or - Copy source files to src folder
- Copy to libs folder & import in necessary .java file
- Useful libraries
- PhotoView: multi-touch zoom images
- Android Universal Image Loader: asynchronously/lazy load images
- Action Bar Sherlock: support action bar on platforms that dont have it
To support old android or new Android
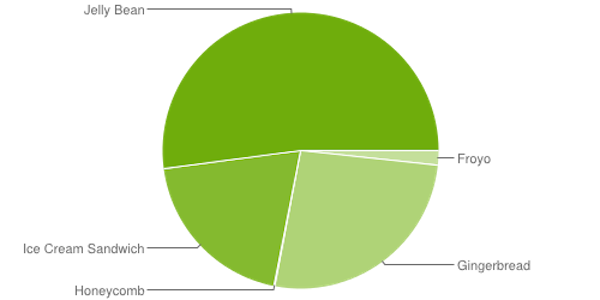
Data collected during a 7-day period ending on November 1, 2013. Any versions with less than 0.1% distribution are not shown.
To support old android or new Android
| Version | Codename | API | Distribution |
|---|---|---|---|
| 2.2 | Froyo | 8 | 1.7% |
| 2.3.3 - 2.3.7 | Gingerbread | 10 | 26.3% |
| 3.2 | Honeycomb | 13 | 0.1% |
| 4.0.3 - 4.0.4 | Ice Cream Sandwich | 15 | 19.8% |
| 4.1.x | Jelly Bean | 16 | 37.3% |
| 4.2.x | 17 | 12.5% | |
| 4.3 | 18 | 2.3% |
Support libraries (ViewPager / ActionBarSherlock) can help but add to app size. Older devices may not have much memory
Problems!!
- Emulator is slow
- Get real hardware
- Use the Atom / x86 Android image & HAXM
- ADT/Eclipse Quirks:
- My app can't compile / Weird errors
- Clean and rebuild the project (Project > Clean)
- Updated code not show in app:
- Happens if you're updaing a resource (e.g. xml) file and not a code/.java file
- Open .java file, make some changes (add comment) and rebuild
- Slow Computer when Saving files: Disable Linting
- My app can't compile / Weird errors
- Android Studio takes a long time to compile
- Use Eclipse
Now to the "and them some" part
PhoneGap
- Needs NodeJS, Java, ant (for OSX, install HomeBrew then "brew install ant" in Terminal)
- Usage*:
sudo npm install -g phonegap
phonegap create my-app
cd my-app
phonegap run android
*Missing instructions: Download latest version of Hello World and move www to the www folder created in your project (there are still some other issues that need to be worked on. Couldn't seem to whitelist URL for ajax call)
View - index.html
<div class="app">
    <div id="appMain">
        <div class="double section">
            <input id="iptName" type="text"><button id="btnChangeName">Change Names</button>
        </div>
        <div class="single section">
            <span id="lblName">Hello</span>
            <button id="btnDeleteNames">Delete Names</button>
        </div>
        <ul id="listNames" class="section no-list-items">
        </ul>
        <div style="display:none">
            <ul id="contextMenu" class="no-list-items">
                <li><a href="#" id="menuDelete">Delete</a></li>
                <li><a href="#" id="menuShare">Share</a></li>
            </ul>
            <a class='inline' href="#contextMenu" style="display:noen">Show Context Menu</a>
        </div>
    </div>
</div>
View - index.html
Use CSS
<link rel="stylesheet" type="text/css" href="css/index.css" />
<link rel="stylesheet" type="text/css" href="css/custom.css" />
<link rel="stylesheet" type="text/css" href="lib/colorbox/colorbox.css" />
Use Javascript
<script type="text/javascript" src="phonegap.js"></script>
<script type="text/javascript" src="lib/jquery-2.0.3.min.js"></script>
<script type="text/javascript" src="lib/colorbox/jquery.colorbox-min.js"></script>
<script type="text/javascript" src="js/index.js"></script>
<script type="text/javascript">
    app.initialize();
</script>
Code
var app = { // Application Constructor
    initialize: function() {
        this.bindEvents(); this.db.init();
        this.ui.lblName = $("#lblName"); this.ui.iptName = $("#iptName");
        this.ui.listNames = $("#listNames");
        this.ui.changeName = $("#btnChangeName");
        this.ui.changeName.click(function(e){
            e.preventDefault();
            if(app.ui.changeName){
                var name = app.ui.iptName.val();
                app.ui.fx.changeName(name);
                if(app.db.addName(name))
                    app.loadNames();
            }
        });
    }
};
PhoneGap on Desktop

Conclusion
Native is typically slower to develop and only works for Android
PhoneGap enables cross platform development using web development technologies
THE END
Timothy Lim / @thewheathttps://github.com/CornerGeeks/GDGBruneiDevFest2013
http://cornergeeks.com/gdg/
Presentation done by reveal.js by Hakim El Hattab